SPRIG INSTALLATION
Installing the Custom Infusion Device
Installing the Sprig wall supply device is quick, easy, and will have you stepping into shower bliss in no time.
Full InstructionsSPRIG INSTALLATION
Installing the Custom Infusion Device
Installing the Sprig wall supply device is quick, easy, and will have you stepping into shower bliss in no time.
Full Instructions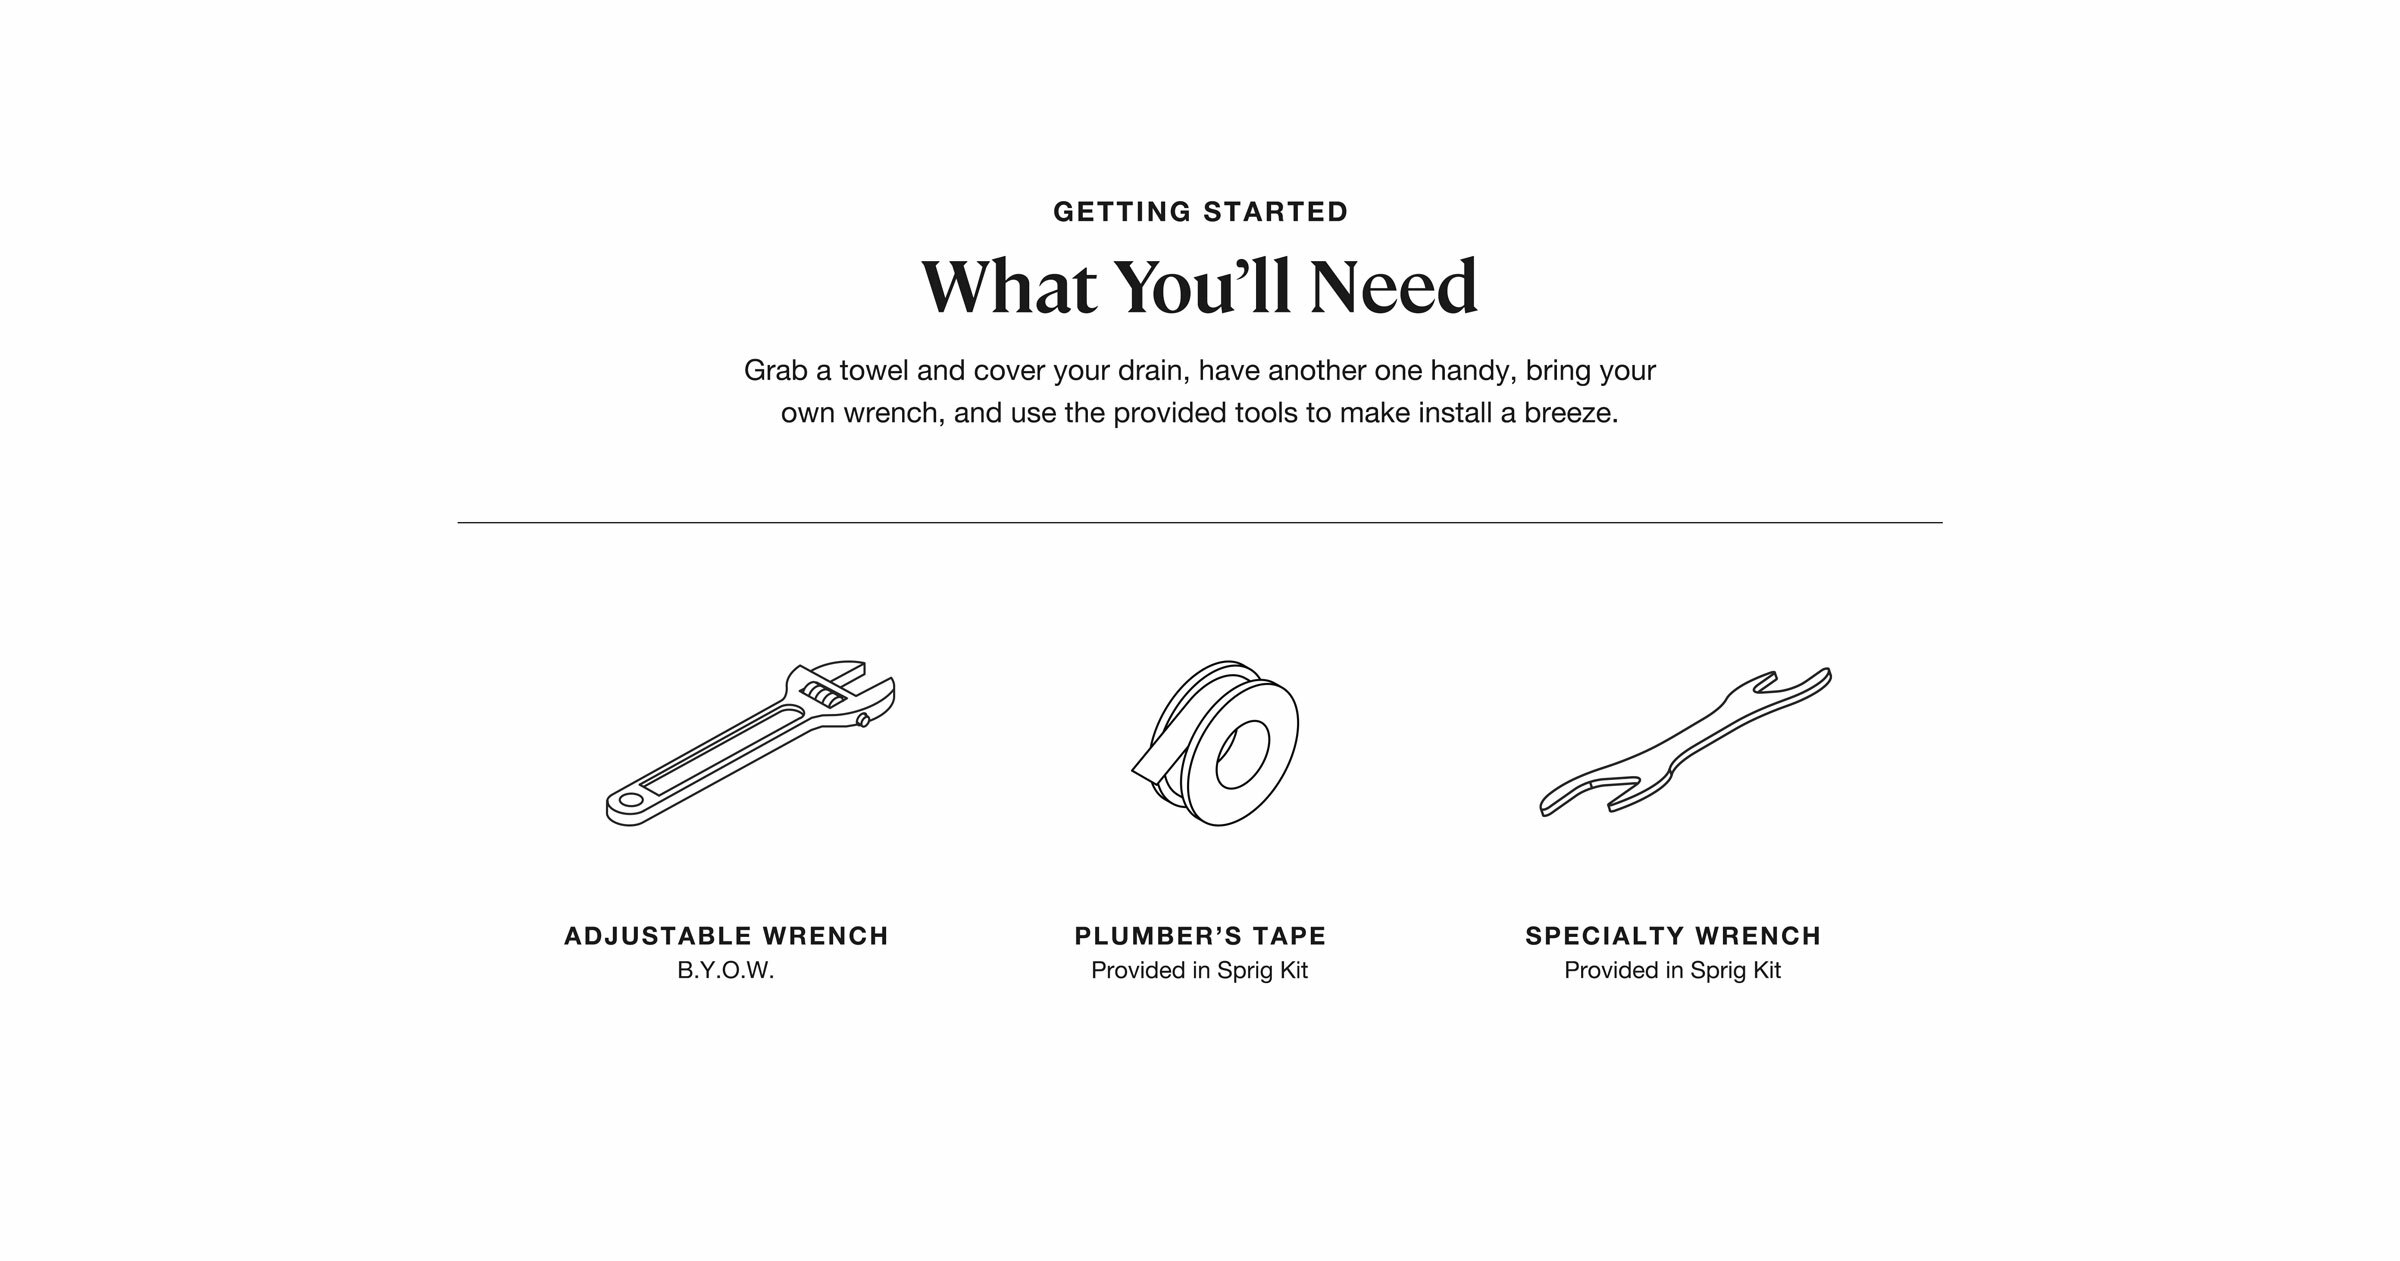
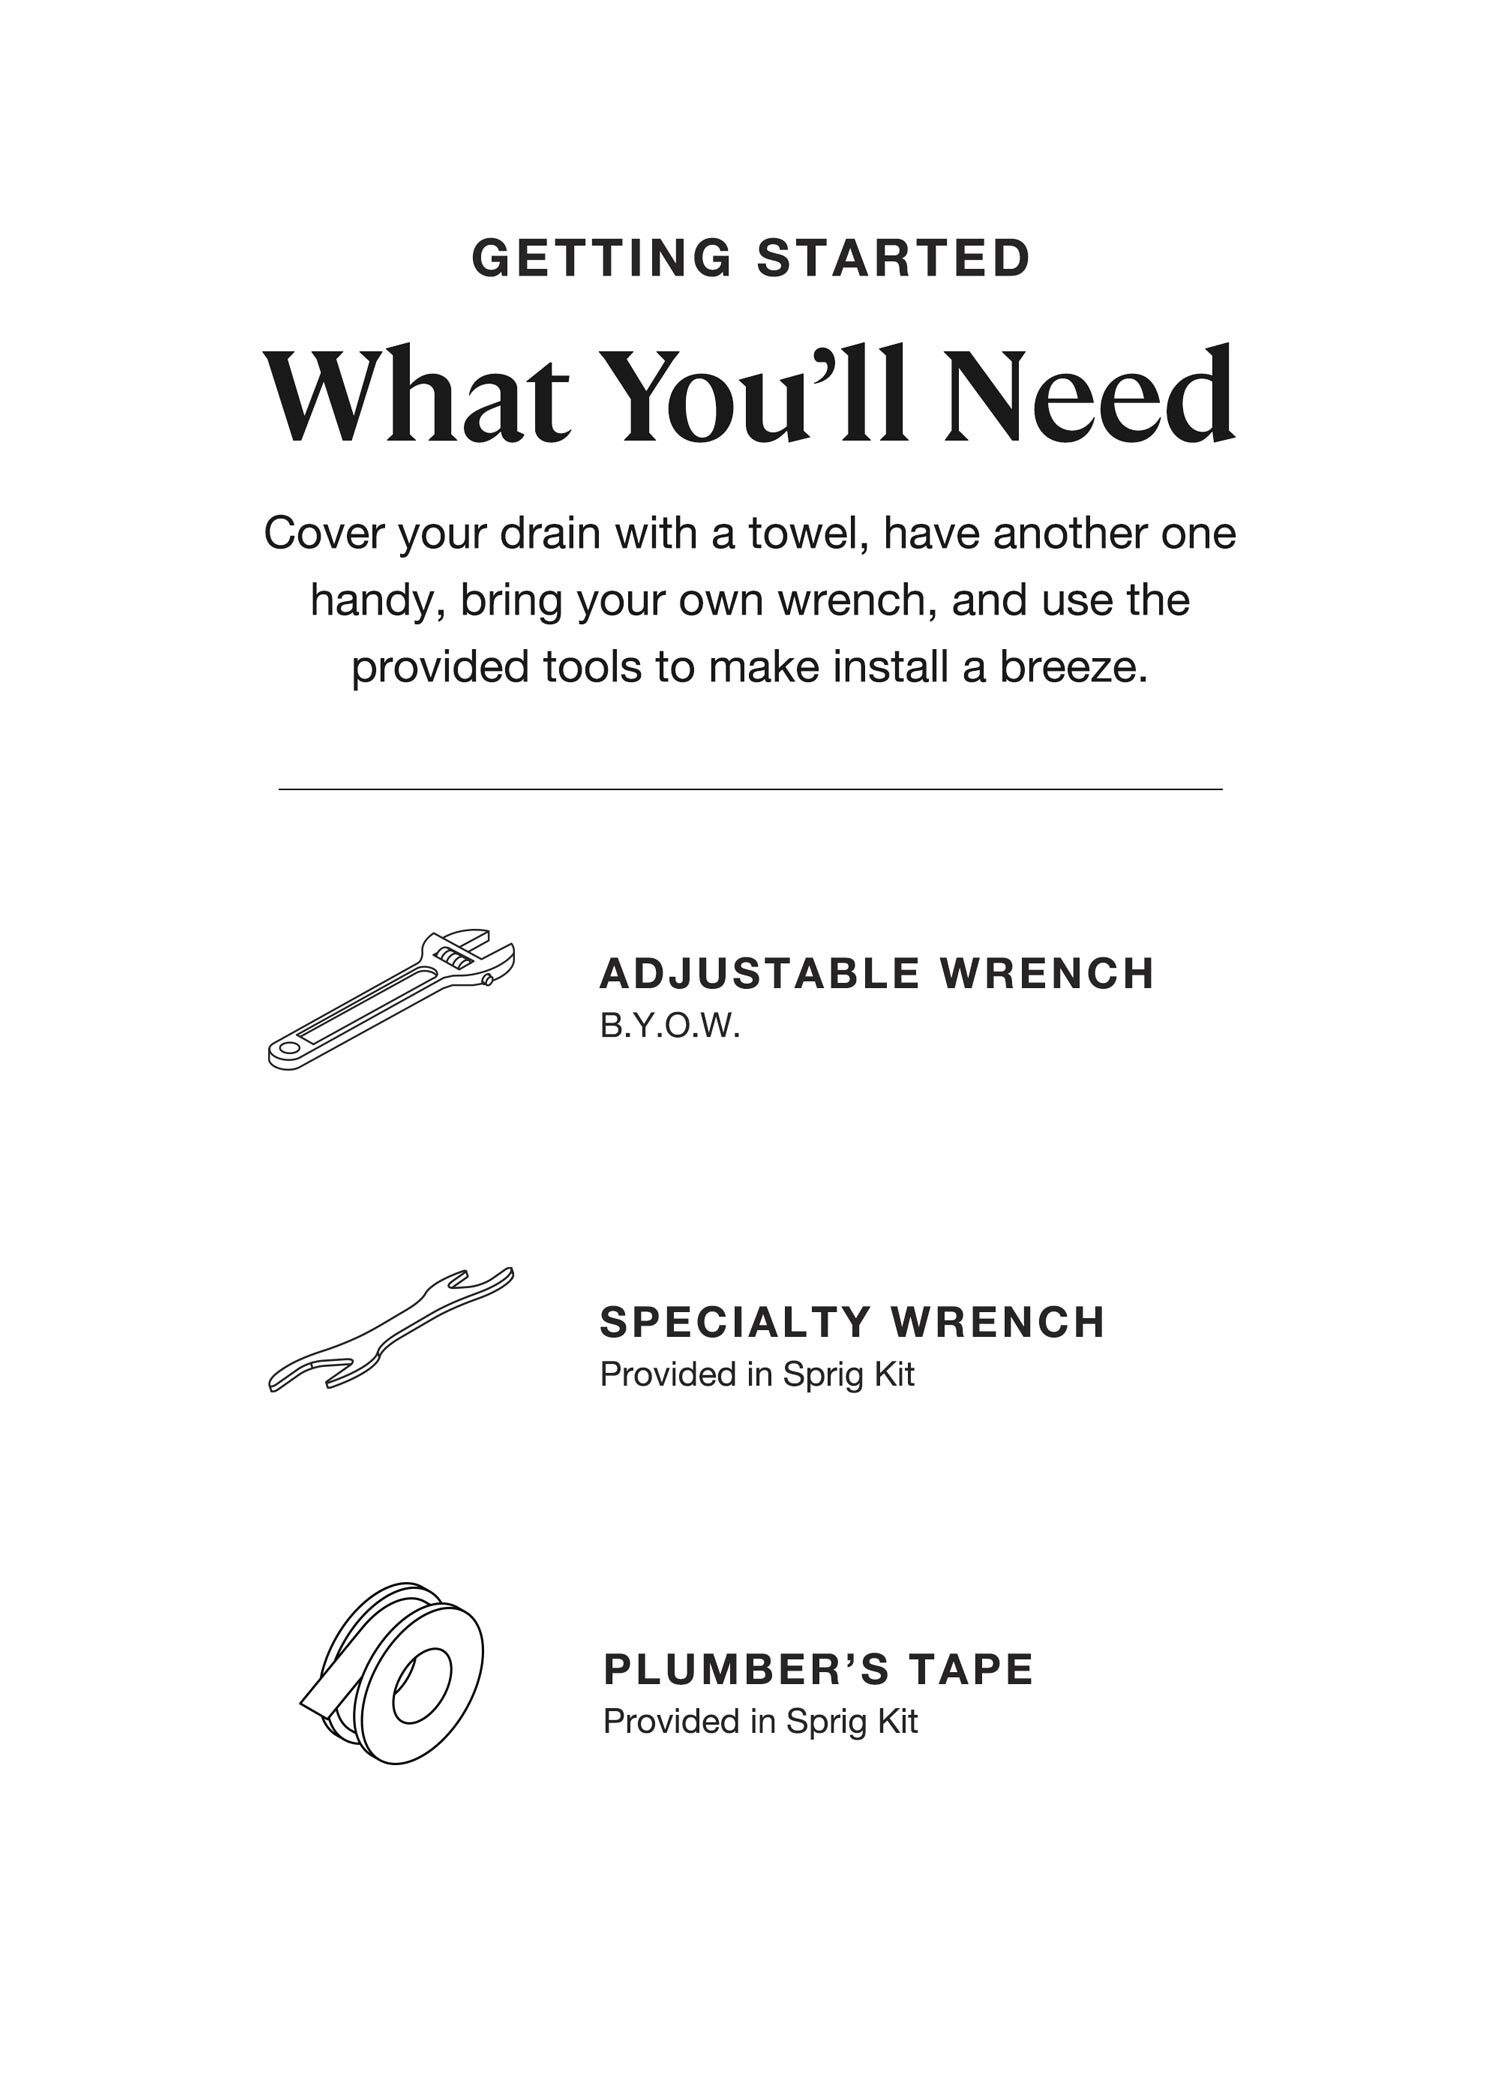
This is how it's done.
INSTALLATION VIDEO
Take a couple of minutes and get familiar with the installation process. Follow these simple steps to make installation a breeze.
Watch Now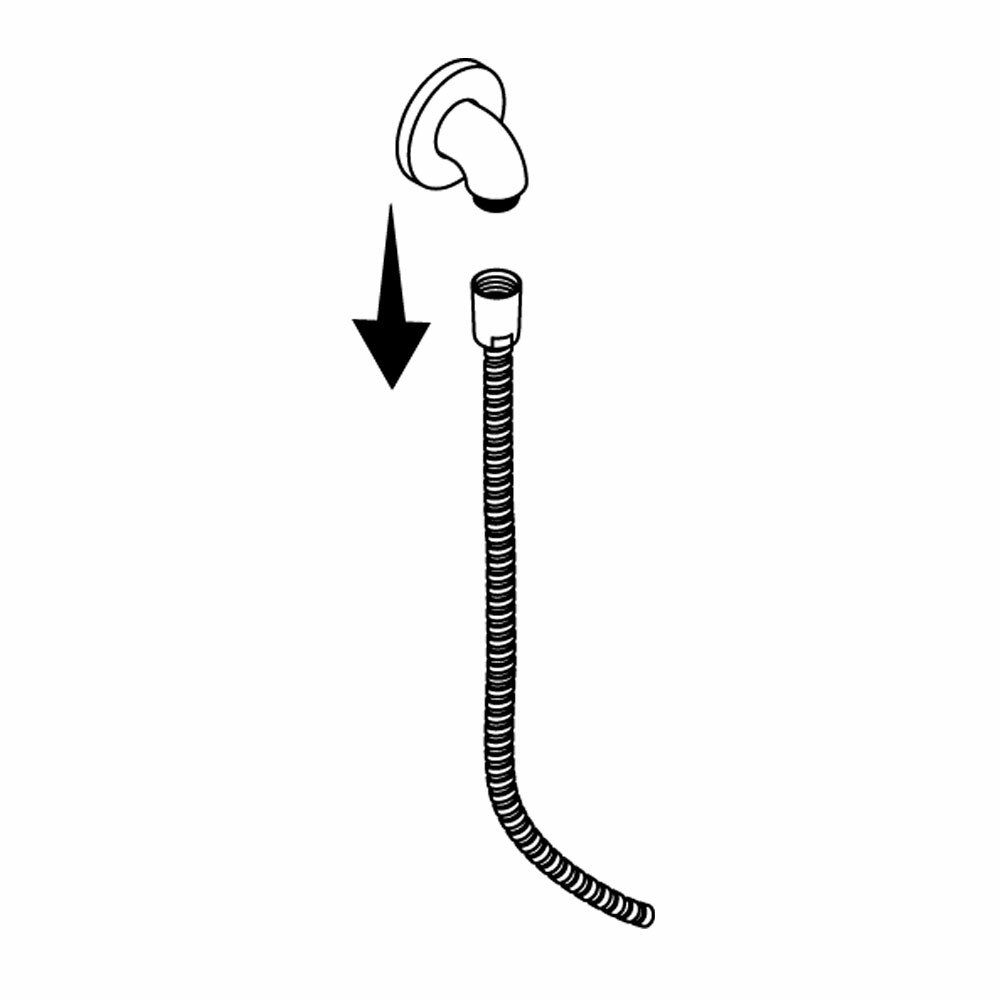
Step #1
REMOVE YOUR SHOWER HOSE
Using an adjustable wrench and a towel, turn shower hose counterclockwise to remove, using the towel to protect from scuffing. Wipe the shower arm clean and dry before moving onto the next step.
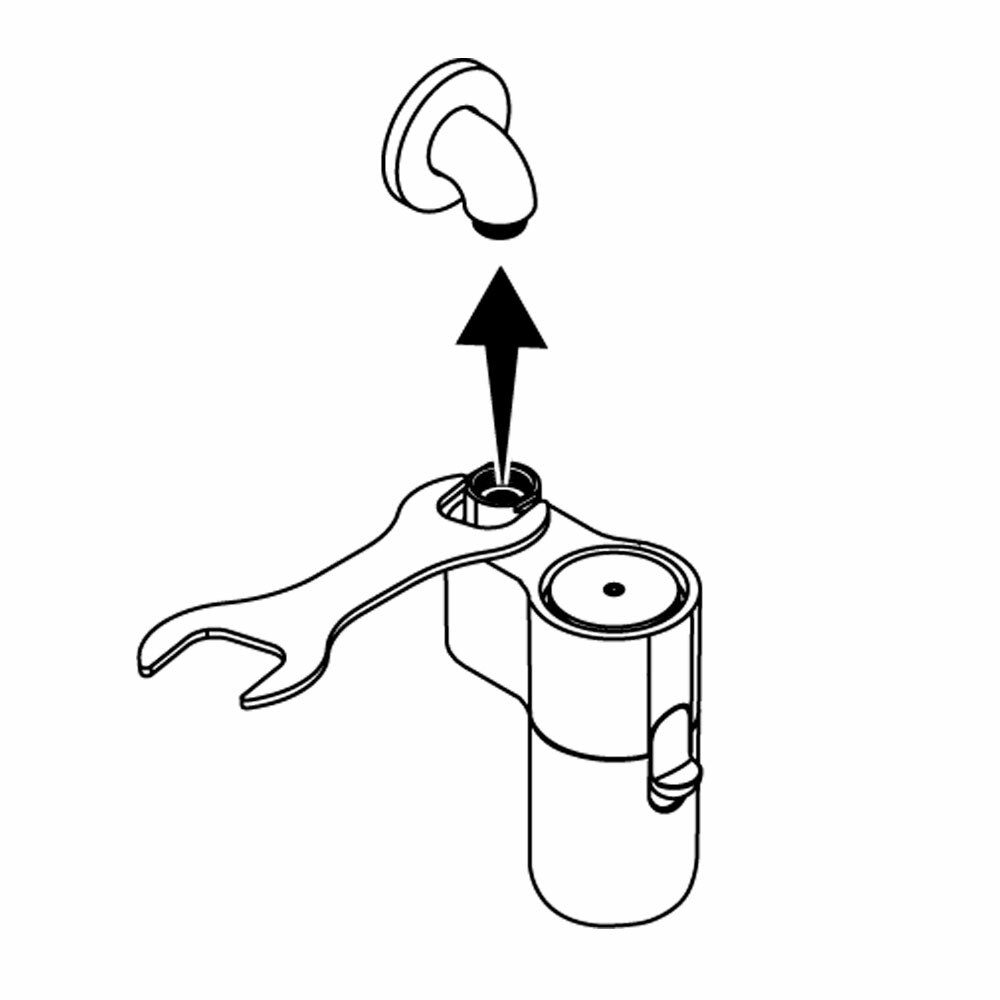
Step #2
INSTALL SPRIG DEVICE
Add plumber's tape around the wall supply threads and attach the Sprig custom infusion device by turning the connector piece clockwise using the provided wrench.
Step #3
RECONNECT SHOWER HOSE
Apply more plumber's tape to the threads of the Sprig device and reconnect your handshower hose, careful to keep handshower gaskets in place.
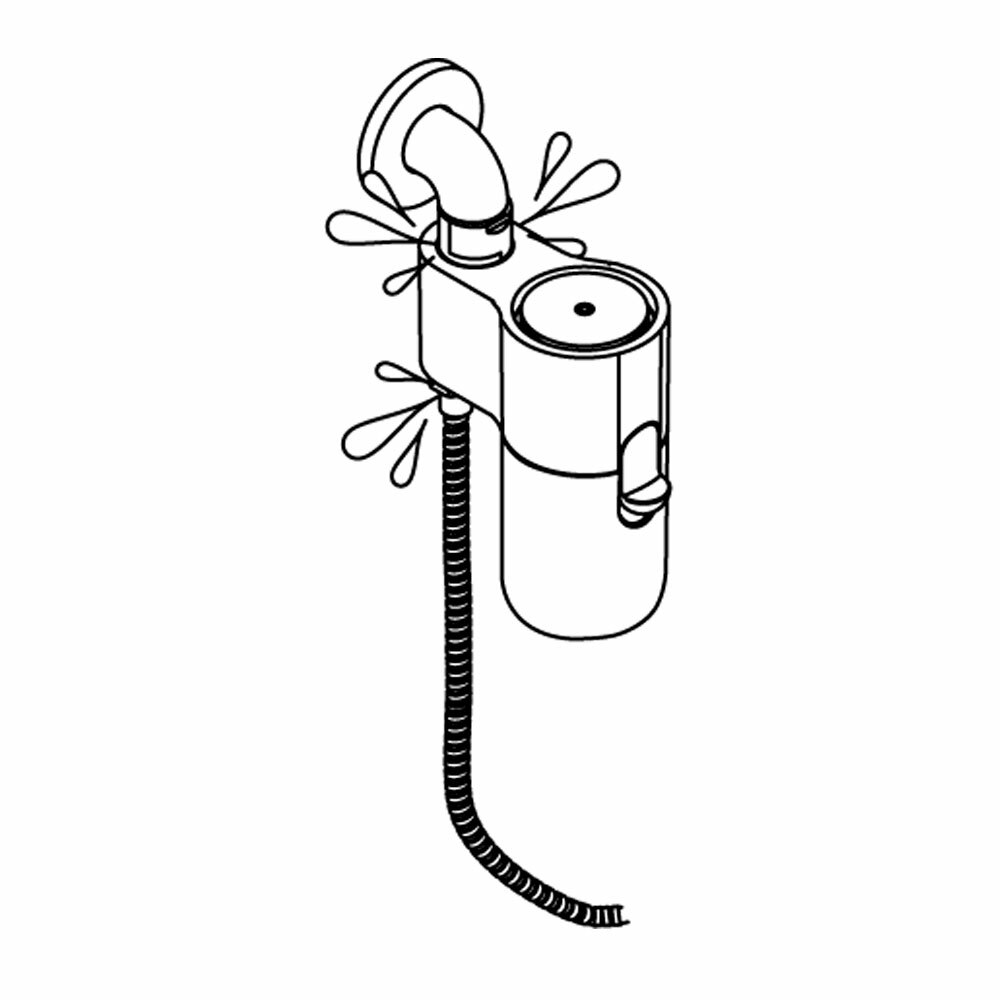
Step #4
TEST FOR LEAKS
Turn on your shower and check for leaks at connection points. In the back of the device, there is a weep hole that is designed to release water when the experience is engaged. This is normal and to be expected.
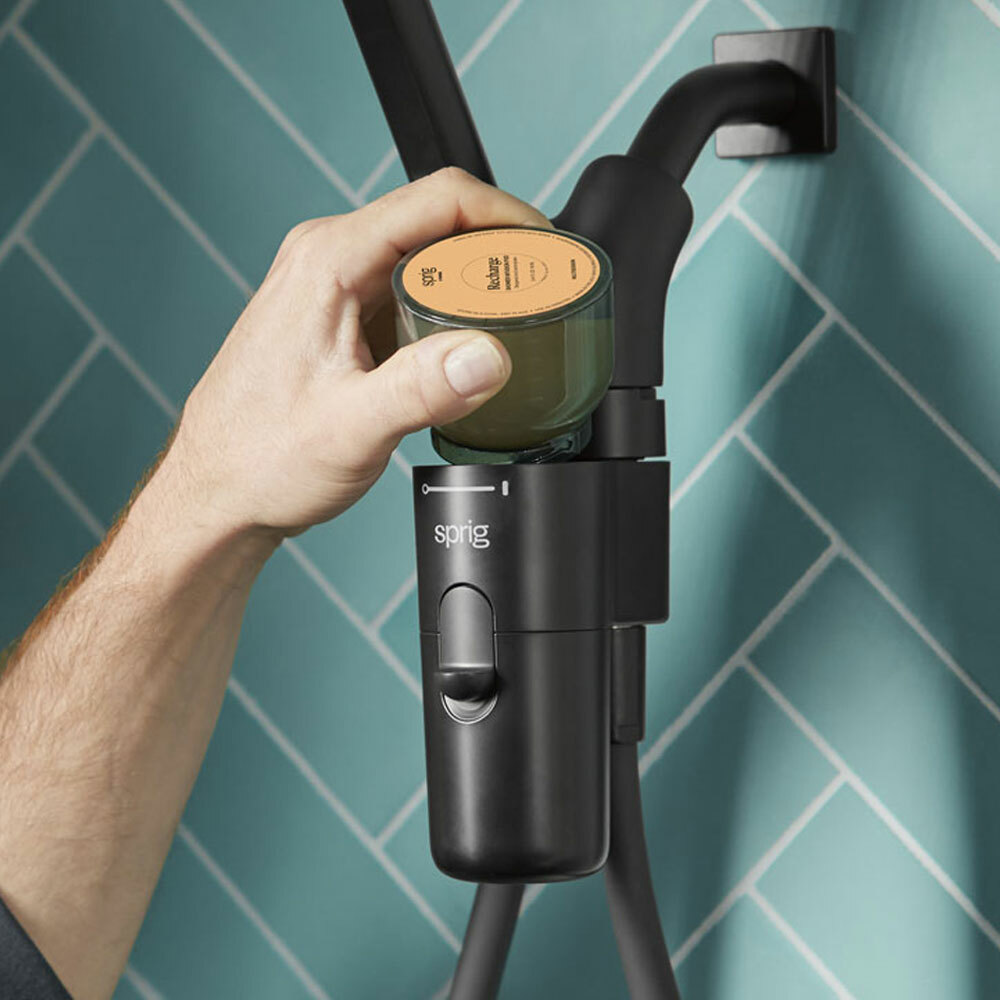
Twist. Click. Bliss.
HOW TO USE SPRIG
Once your device is installed, the fun part begins. Pick a pod, do the twist, and step into shower bliss as your space fills with mood-matching aromatherapy and premium self-care ingredients.
How It Works